Hero reveal with AI
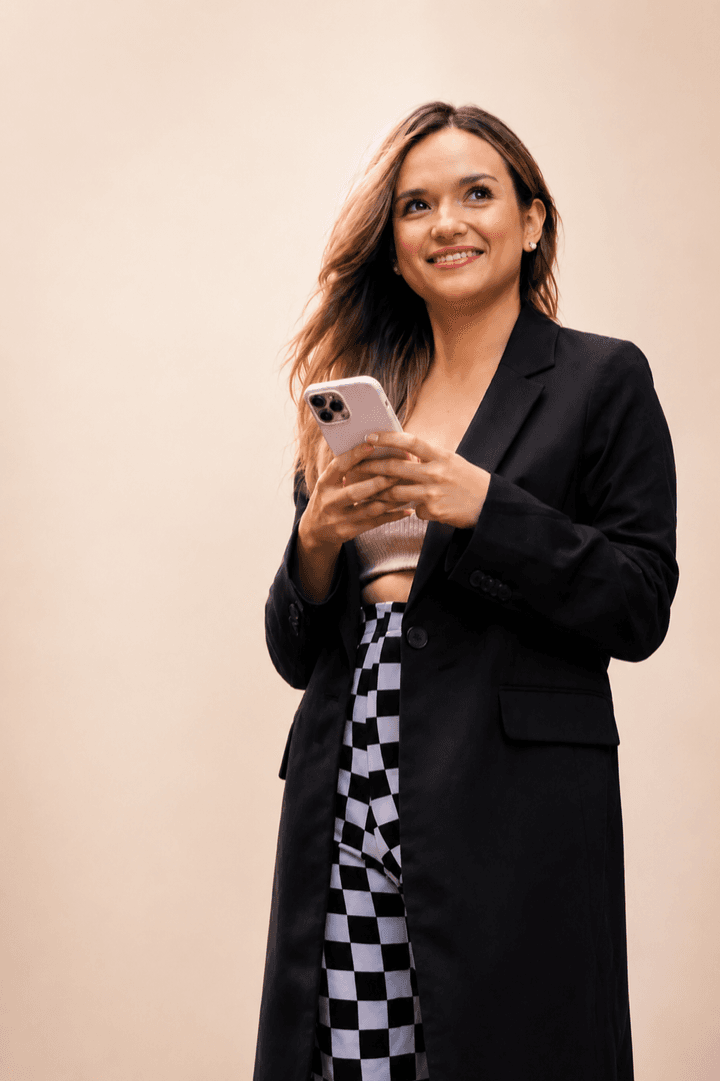
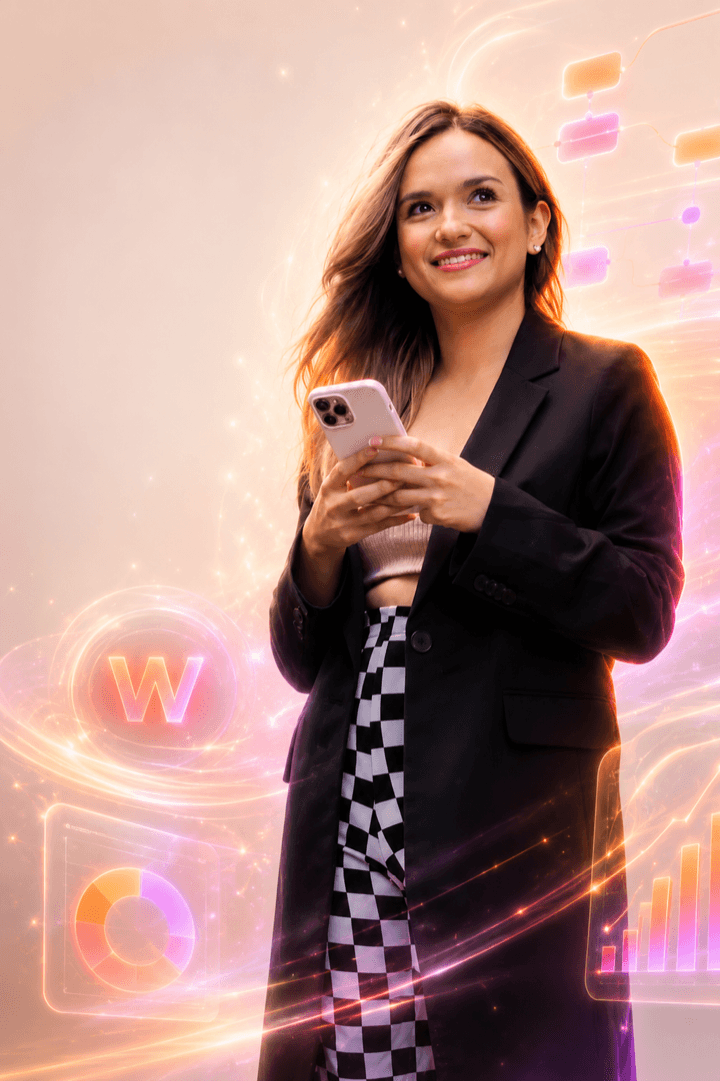
The effect behind this site's hero: my real photo on the surface, and under your cursor my AI-native mode peeks through a circle of light. Two twin images from ChatGPT, a 10-line script and CSS that runs on the GPU.
The demo
The system
 ChatGPTreveal with identity lock + base twin
 Python + Pillowresize + crop, fixes the 5% offset
The tools
ChatGPTimages
Generates both twins using my real photo as the reference. The identity lock lives in the prompt.
Python + Pillowalignment
10 lines that fix the shifted framing. The step nobody tells you about.
CSS clip-patheffect
The spotlight that follows the cursor. Runs on the GPU, not a single library.
Replicate it step by step
The code, the connections and the mistakes I already made for you.
Generate the reveal with an identity lock
The image that peeks under the cursor comes from ChatGPT, using your real photo as the reference. The key is the identity lock: you forbid it from touching the person and only allow it to transform the world around them. This is the real prompt I used:
prompt · reveal image (ChatGPT)Use the attached image as the reference. Keep the woman EXACTLY as she is: do not change her face, skin, hair, expression, body, pose, outfit, the phone in her hands, or the framing and crop. Her identity must stay 100% identical to the reference, same person, untouched. Only transform the WORLD around her into "AI-native command mode": the background city dissolves into a luminous, elegant orchestration of growth dashboards, flowing data streams and AI workflow nodes (minimal, not cluttered). Brand palette only: warm orange (#fe6f01), magenta-pink and soft lavender, glowing over a cream base. A subtle glowing letter "W" emblem of light hovers beside her as her insignia. Soft orange and magenta rim light along the edge of her blazer and hair. Cinematic, premium, optimistic, semi-realistic editorial quality. Keep the same vertical 2:3 crop and the negative space on the left. No text, no logos, no watermark. Negative prompt: cartoon, flat illustration, anime, distorted face, extra fingers, deformed hands, cluttered, busy background, text, logos, watermark, low quality, blurry faceAsk for the base twin
For the effect to work, the visible image and the hidden one must be twins: same person, same pose, same framing. The trick is asking the same model for both, in the same session and with the same lock, so the grain and rendering match. Only the world changes:
prompt · base twin (ChatGPT)Use the attached image as the reference. Keep the woman EXACTLY as she is: do not change her face, skin, hair, expression, body, pose, outfit, the phone in her hands, or the framing and crop. Her identity must stay 100% identical to the reference, same person, untouched. Render the SAME photo with no effects: keep the world natural and calm, soft warm light over a cream base, premium semi-realistic editorial quality. No dashboards, no data streams, no glow, no emblem. Keep the same vertical 2:3 crop and the negative space on the left. No text, no logos, no watermark.Align the twins with 10 lines of Pillow
Even if the prompt says “same framing”, ChatGPT never returns the exact crop: mine came back with a 5% offset and the face jumped when the cursor passed over it. I fixed it with a mini Pillow script: scale and crop the base until both images are pixel-perfect.
python · align.py# align.py · aligns the base twin with the reveal (Pillow) # ChatGPT returned the base ~5% off: fix it with resize + crop. from PIL import Image REF = "reveal.png" # the image that rules (the correct framing) SRC = "base.png" # the misaligned twin SCALE = 1.05 # correction factor (my case: 5%) DX, DY = 0, -18 # fine adjustment in pixels (by eye, iterating) ref = Image.open(REF) src = Image.open(SRC).convert("RGB") # 1. Scale the base by the correction factor w, h = ref.size big = src.resize((round(w * SCALE), round(h * SCALE)), Image.LANCZOS) # 2. Crop the center (plus the fine adjustment) to the reveal's exact size left = (big.width - w) // 2 + DX top = (big.height - h) // 2 + DY big.crop((left, top, left + w, top + h)).save("base-aligned.png")Mount it: clip-path + cursor lerp
Two stacked images. The top one (AI mode) gets cropped by a circular clip-path that follows the cursor with smoothing (lerp) inside a requestAnimationFrame. The radius opens fast and closes soft, and everything composites on the GPU:
html + css + js · the full effect<div class="stage"> <img class="base" src="base-aligned.png" alt="" /> <img class="reveal" src="reveal.png" alt="" /> </div> <style> .stage { position: relative; } .stage img { position: absolute; inset: 0; width: 100%; } .reveal { clip-path: circle(var(--r, 0px) at var(--x) var(--y)); } @media (prefers-reduced-motion: reduce) { .reveal { display: none; } } </style> <script> const stage = document.querySelector(".stage"); let rawX = 0, rawY = 0, x = 0, y = 0, r = 0, targetR = 0; stage.addEventListener("mousemove", (e) => { const b = stage.getBoundingClientRect(); rawX = e.clientX - b.left; rawY = e.clientY - b.top; targetR = 150; /* spotlight radius */ }); stage.addEventListener("mouseleave", () => { targetR = 0; }); (function frame() { x += (rawX - x) * 0.14; /* lerp: the smooth travel of the spotlight */ y += (rawY - y) * 0.14; /* opens fast (0.16), closes soft (0.08) */ r += (targetR - r) * (targetR > r ? 0.16 : 0.08); stage.style.setProperty("--x", x.toFixed(1) + "px"); stage.style.setProperty("--y", y.toFixed(1) + "px"); stage.style.setProperty("--r", Math.max(0, r).toFixed(1) + "px"); requestAnimationFrame(frame); })(); </script>The fallback is design too
On touch screens the finger plays cursor, and with prefers-reduced-motion the reveal layer turns off and the base photo stays. An effect that makes people dizzy is not a premium effect.
The Escuelita is no longer a waitlist: it's a live workshop
Content creation with AI. Thursday, July 16, 4pm CDMX. Pick your door:
The live workshop
2 hours with me · you leave with 30 days of content for your business, made and scheduled · you keep materials you can use anytime · the recording is yours forever.
13 seats leftSave my seat →I'll keep you posted
Want updates on new courses and workshops? Leave me your email.
Zero spam. Only things that help.Keep going with these